Sash Wood Window Restoration
Restoring 1960s Sash Windows: Breathing Life into Woodwork After 16 Years Sealed Shut
In a world that often favors replacement over repair, restoring original wood sash windows from the 1960s feels like an act of quiet rebellion and respect. These windows had been sealed shut for over 16 years since their last paint job, their edges locked tight with layers of time, paint, and neglect. But beneath that stillness was a solid structure, waiting to move again.
Step One: Opening Without Breaking
The first challenge was simple to describe but delicate to execute: open the windows without causing any damage. Over the decades, these windows had become fused in place swollen with humidity, painted shut repeatedly, and untouched for years. Every tool, every movement had to be intentional.
There’s a certain reverence that comes when working with original materials. I wasn’t just trying to access them I was trying to understand them.

Step Two: Diagnose Before Repair
Once the sashes were finally free, the real evaluation began. I inspected every component, sash cords, pulleys, joints, glass, putty, and the surrounding frames. Some had aged gracefully, needing only a refresh. Others had hidden damage: frayed cords, weather-worn sills, brittle glazing, and small signs of moisture intrusion.
Each window had its own list of needs. Restoration isn't one-size-fits-all it's a custom diagnosis every time.

Window with fire damage
Step Three: Structural and Aesthetic Restoration
I tackled the repairs in two parallel tracks: structural integrity and aesthetic revival.
Structurally, I repaired joints, replaced sash cords with new ones, ensured smooth gliding using traditional pulley systems, and sealed every gap to eliminate entry points for water. The goal was simple but non negotiable: the windows had to open smoothly, effortlessly—ideally with just two fingers.
Aesthetically, the work was about honoring the original 1960s craftsmanship while making it feel fresh. That meant stripping back the old, uneven paint, sanding with care, and repainting with weather-resistant, breathable finishes. The final look was clean, elegant, and timeless.

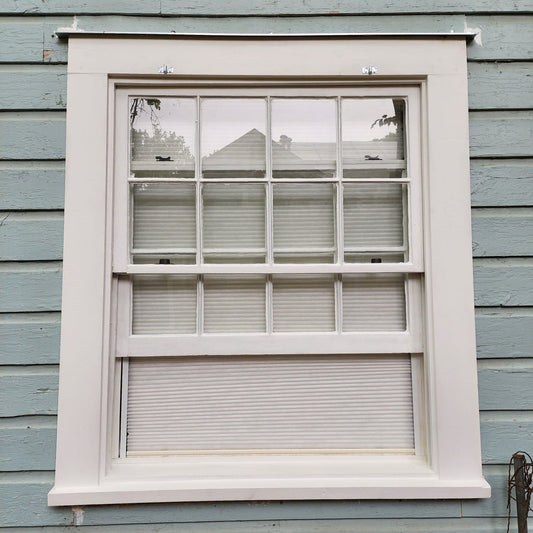
Restored window before paint and finish
Step Four: Defense Against the Elements
Old wooden windows are most vulnerable where water can sneak in. Any small hole or hairline crack is an open invitation for decay to begin again. I meticulously sealed every edge and joint especially where glass meets wood to ensure rain and humidity had no way in.
Restoration isn’t just about how something looks. It’s about how long it will last.
Why It Matters
These 1960s sash windows are more than just functional. They’re a part of the home’s story designed at a time when wood was dense, old-growth, and meant to last. By restoring rather than replacing, I’m helping preserve a layer of history, while giving it the strength and performance to face decades to come.
If you have vintage windows don’t write them off. With the right approach, they can move again, breathe again, and serve better than most modern replacements ever could.